Microsoft Single Sign-On (SSO) Configuration
To configure Single Sign-On (SSO) using Microsoft Entra ID (formerly known as Azure Active Directory) on the platform, the customer will need to perform a few steps in their own Microsoft Entra ID environment and provide platform-specific information.
Instructions for Configuring SSO
1. Sending information by the Quiker team Quiker’s Customer Success (CS) team will be responsible for providing the information needed to configure SSO, such as:
- Redirect URIs and Single Page URIs
- Logout URL from the platform.
2. Configuration by the hiring company’s IT team With the data provided, the company’s internal IT team will be able to configure SSO directly in Azure AD, following the documented instructions.
3. Return of configuration data for final integration After configuration, the company must return the data generated in Azure AD, such as:
- **Application (Client) ID, in Portuguese called ** Application (client) ID
- Client Secret is the Value in the Client Secret
- Domain referring to the company email
1. Registering an Application
It is necessary to register the platform as an application in the customer environment.
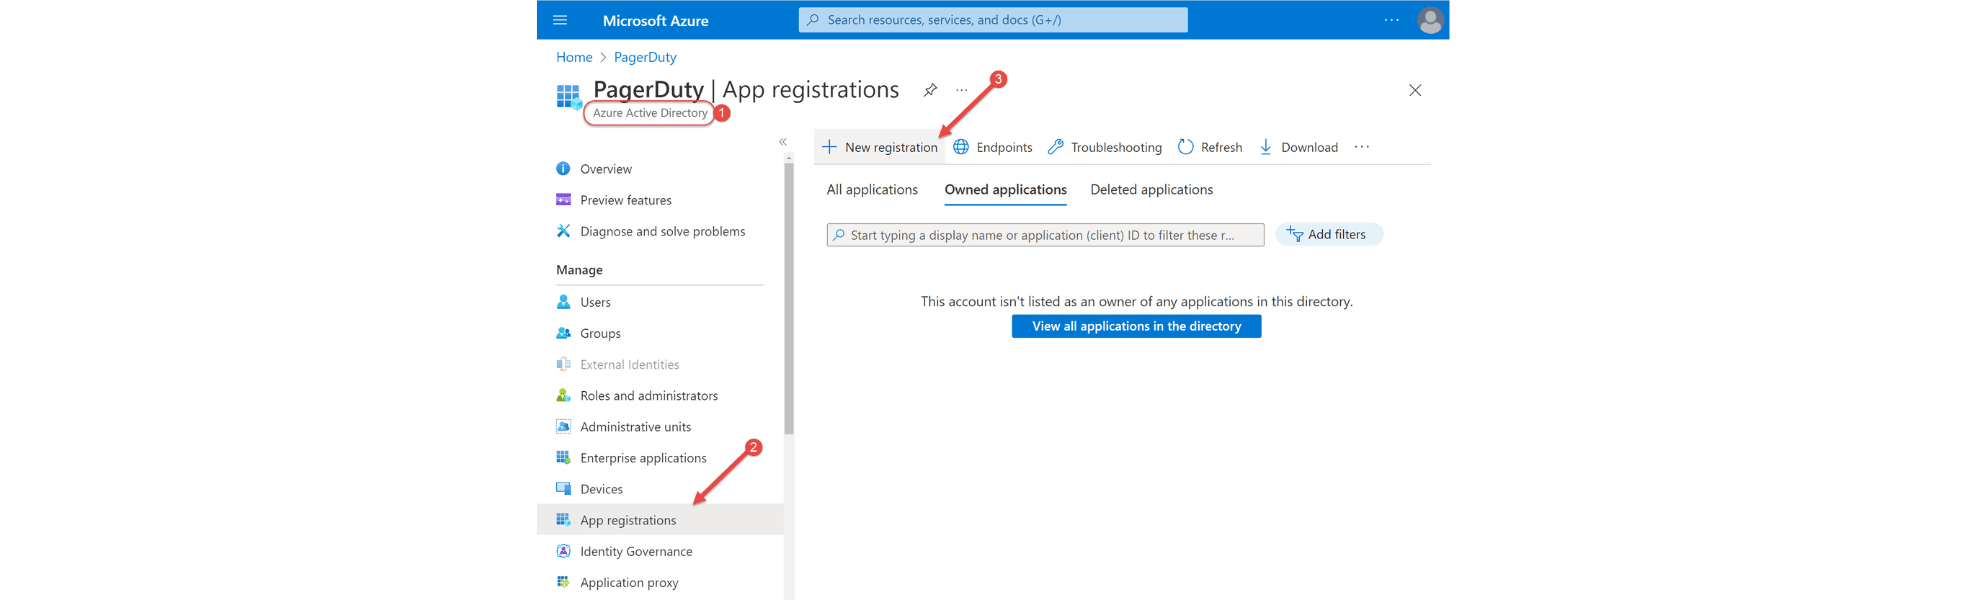
-
Access Azure Active Directory.
-
In the left menu, select “App registrations”.
If you do not have an application registered to perform this action, continue with step 3 and create a registration
3.Click on “+New registration” at the top of the screen and create an application for the innovation management platform
Provide a name (ex: Innovation_ SSO_), choose the account type (Accounts in this organizational directory).
If you have already created the application registration or after completing the registration, access the application page and copy the Application (Client) ID value (Explained in step 2 how to obtain it).
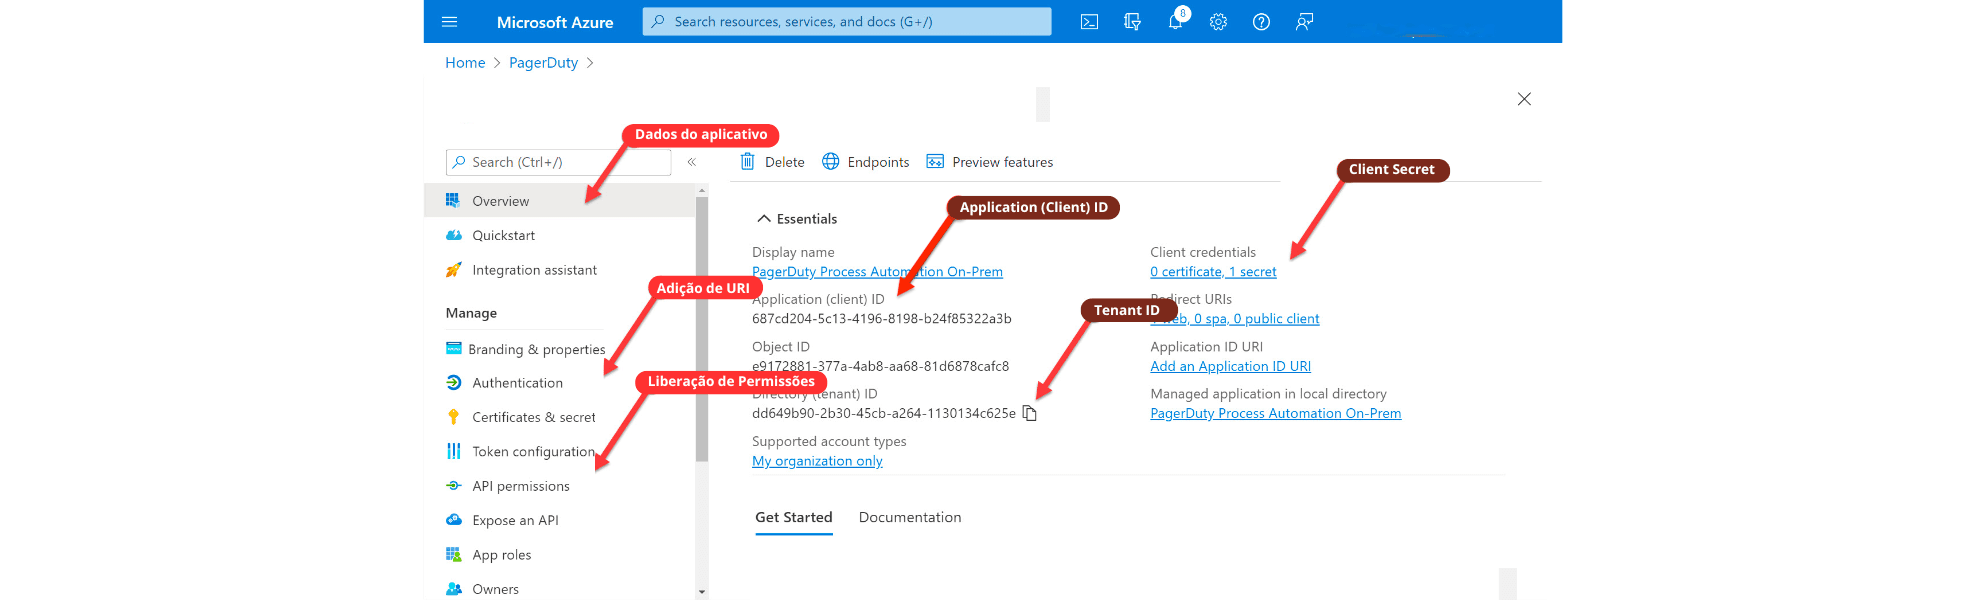
2. Find **the Client (Application) ID **
The **Client (Application) **ID is the application’s unique identifier at the identity provider, used by SSO to recognize which app is requesting authentication.
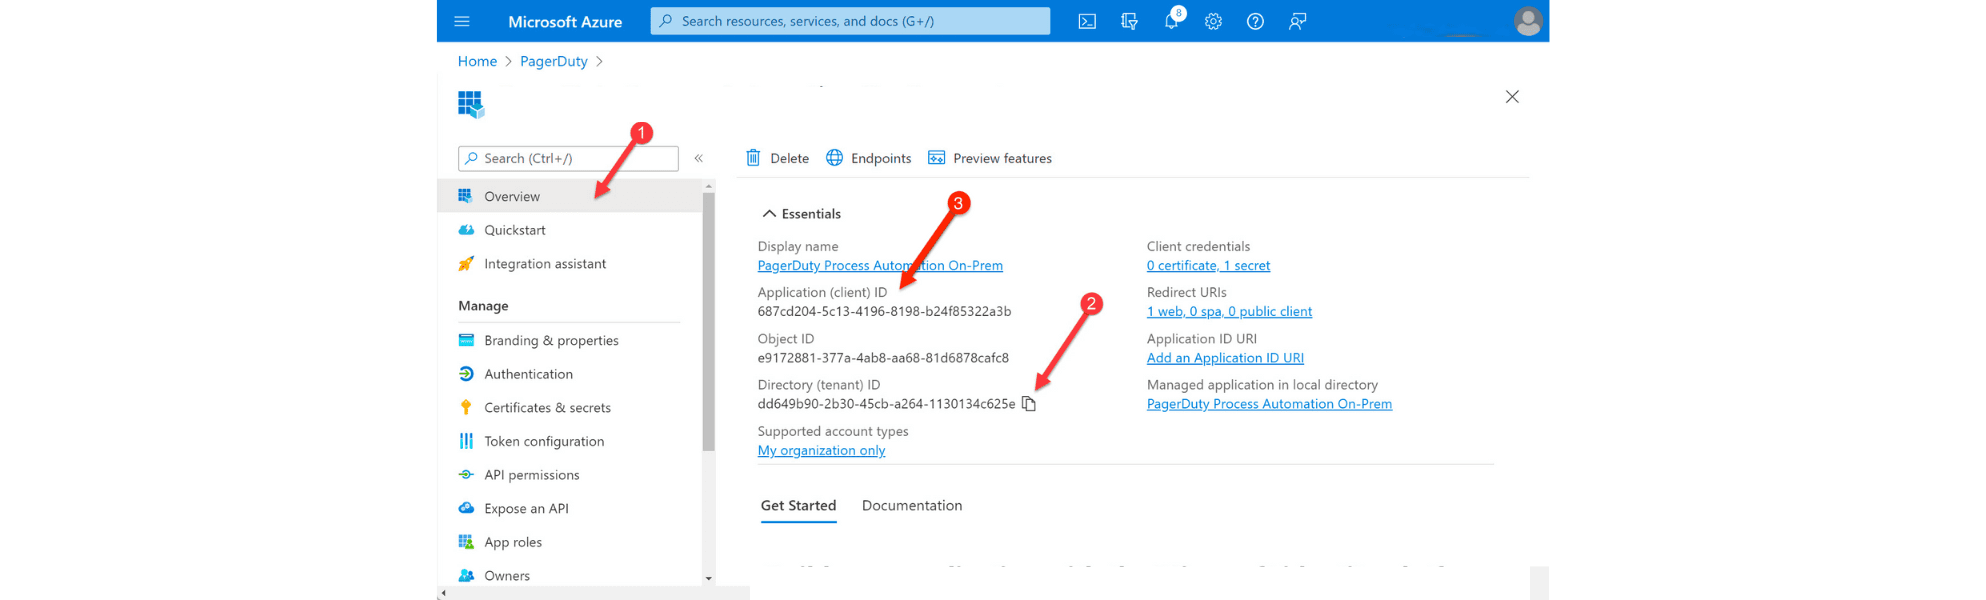
After registering a new application, or accessing an existing application in App registrations, it is possible to view the **Client (Application) **ID directly in the application information. However, you can also find this identifier directly in the directory properties, as described below:
Step by step:
-
Go to Microsoft Entra Admin Center or Azure Portal .
-
Navigate to: Microsoft Login ID → Properties.
-
Locate the **Client ID field (icon 3 in the image), **copy this value. You will use this value as the
client (application) IDon the Quiker platform.
3. Generate the Client Secret
The client secret works as a “password” for the registered application.
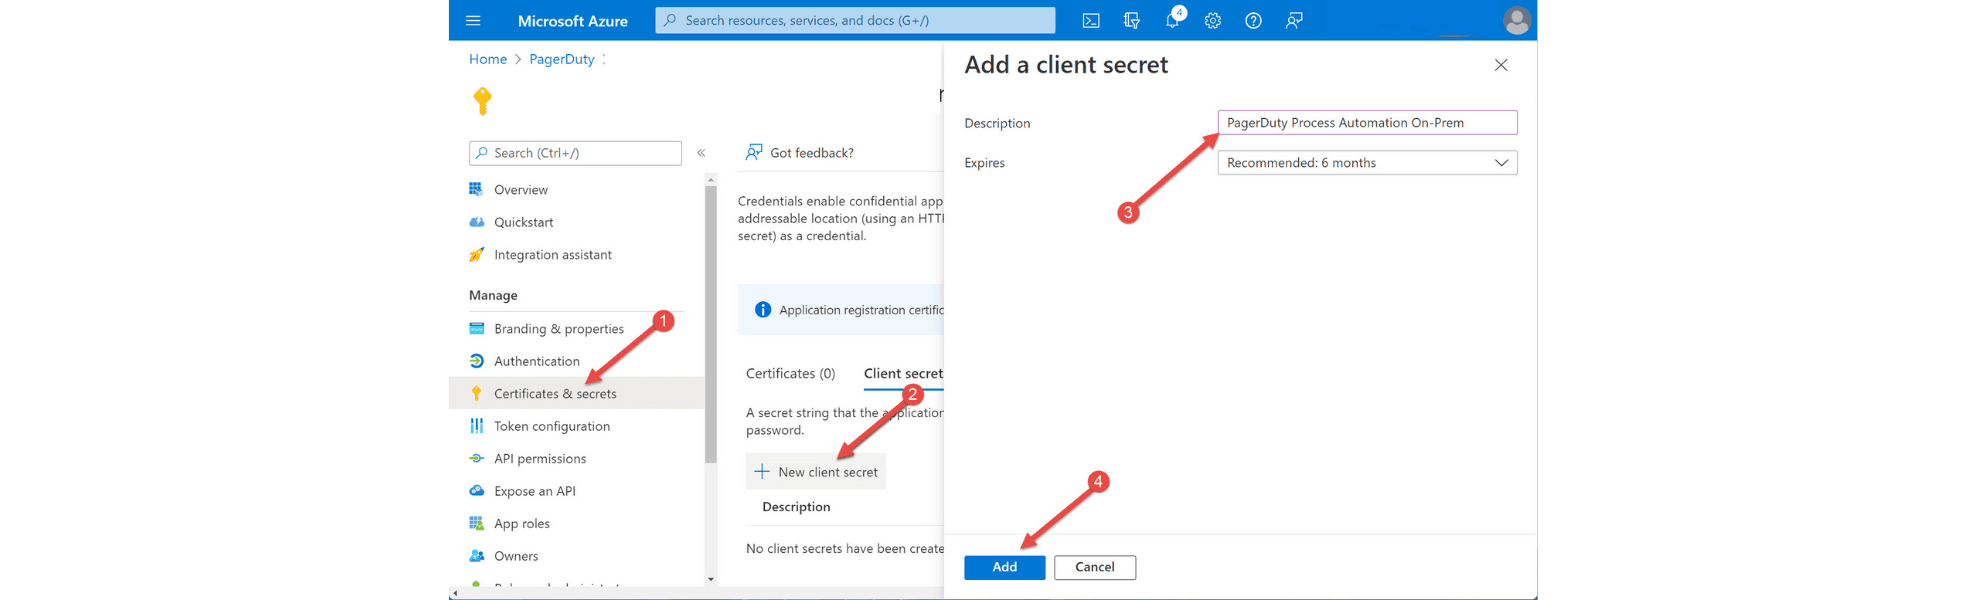
**Step by step:**1. Go to Certificates & Secrets.
-
Click + New client secret.
-
Enter a description and set the expiration period.
-
Select “Add” at the bottom of the screen.
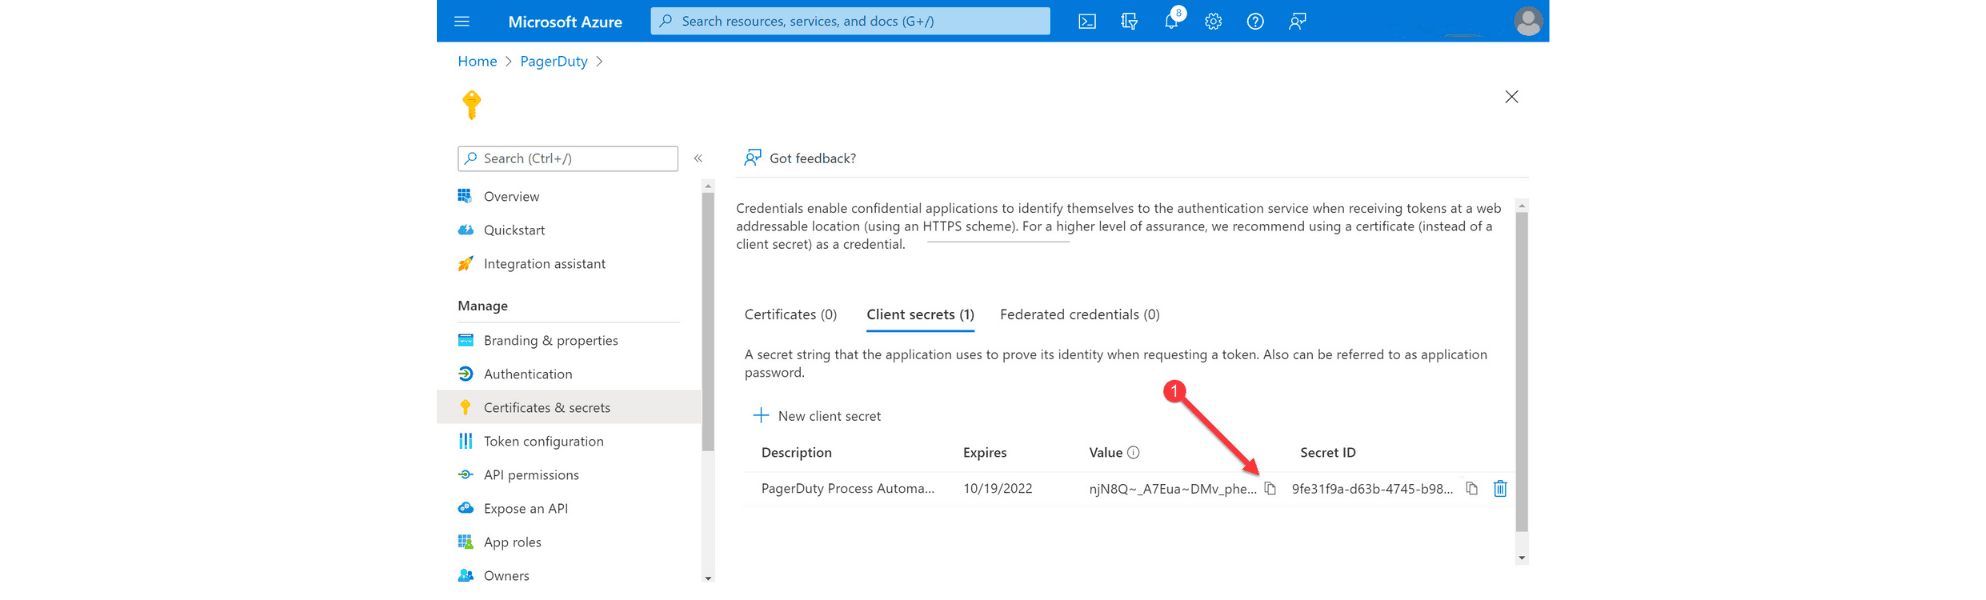
** Immediately copy the generated value** — it will not be shown again.
4. Domain
Although it is not sent directly to the platform, it is essential that:
Users who access the platform via SSO have a UPN (Principal User Name) or email associated with a verified and managed domain in the Microsoft Entra ID environment.
Example:
seu_domino.com.br💡 This domain is used to confirm authentication and allow access to the platform with the associated SSO
5. Configure API Permissions
API permissions provide integration with the platform and enable authentication
Then add the necessary permissions in Azure.
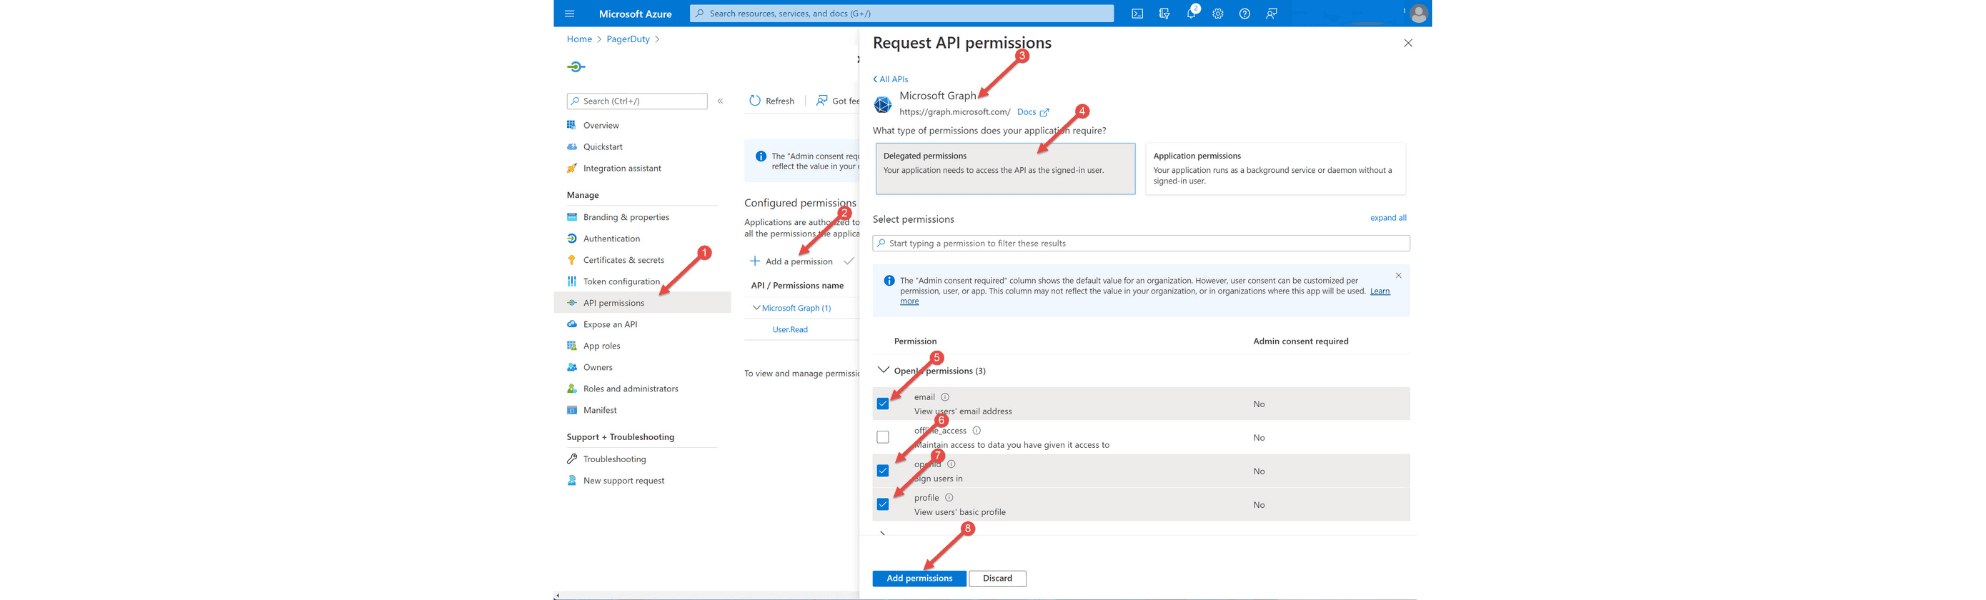
-
In the left menu, select “API Permissions”
-
Click “+Add a permission”
-
Select “Microsoft Graph” as the permission type
-
Select “Delegated Permissions”
-
Check the “User.Read” permission
-
Click “Add Permission” at the bottom
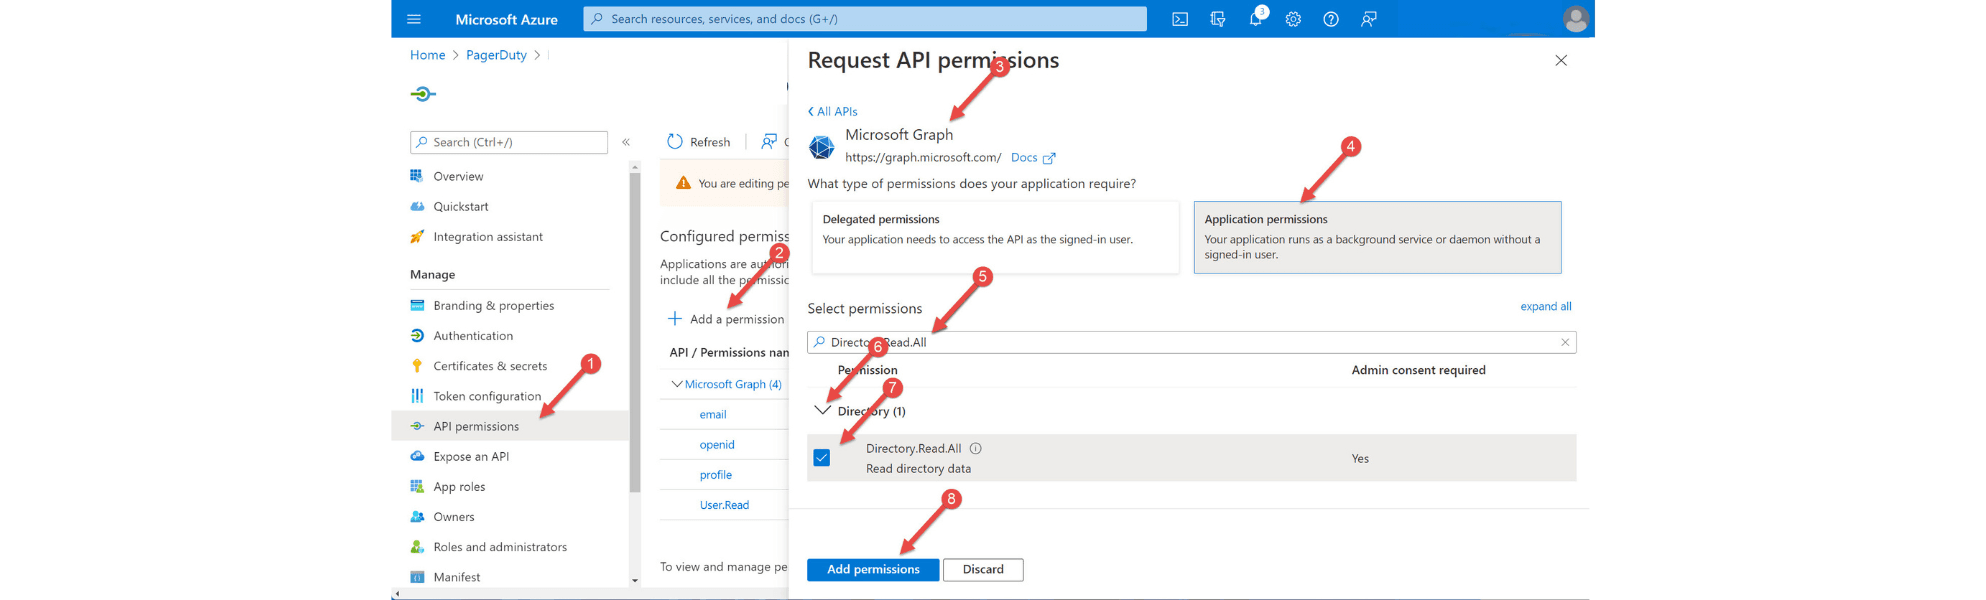
-
In the left menu, select “API Permissions” again
-
Click “+Add a permission”
-
Select “Microsoft Graph” as the permission type
-
Select “Application Permissions”
-
In the search field, type “Directory.Read.All”
-
Expand the “Directory” section
-
Check the “Directory.Read.All” permission within “Directory”
-
Click “Add Permission” at the bottom
6. Registering Redirect URI
The Redirect URI will be provided by the platform and is essential for authentication to return.
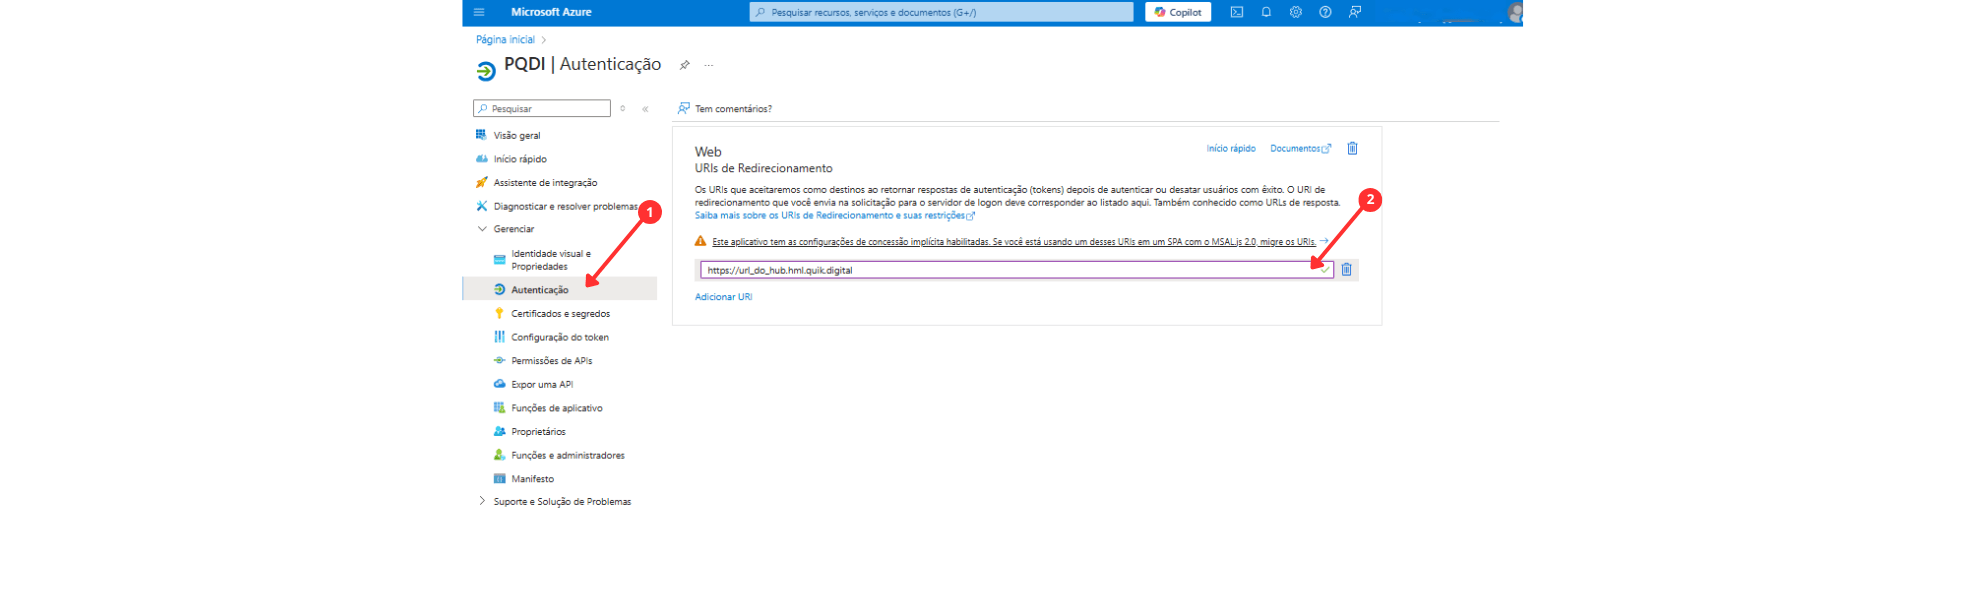
When configuring SSO in Azure, you must register redirect URIs to ensure authentication completes correctly. Our platform requires you to configure two redirect URI entries: one for Web applications and one for Single Page Application (SPA).
The Redirect URI is provided by our platform and is essential for the user to be redirected correctly after successful login
- In the left menu, select “Authentication”
Create entries for the URIs using the “Add a platform” button and provide the URI for each field defined below:
- In the “Web > Redirect URIs” field (icon 2 in the image), enter the URL provided by the application.
Example:
https://api.quiker.com.br/functions/v1/sso-callback💡 This URL is used to redirect the user after successful login
- Registering Logout URL
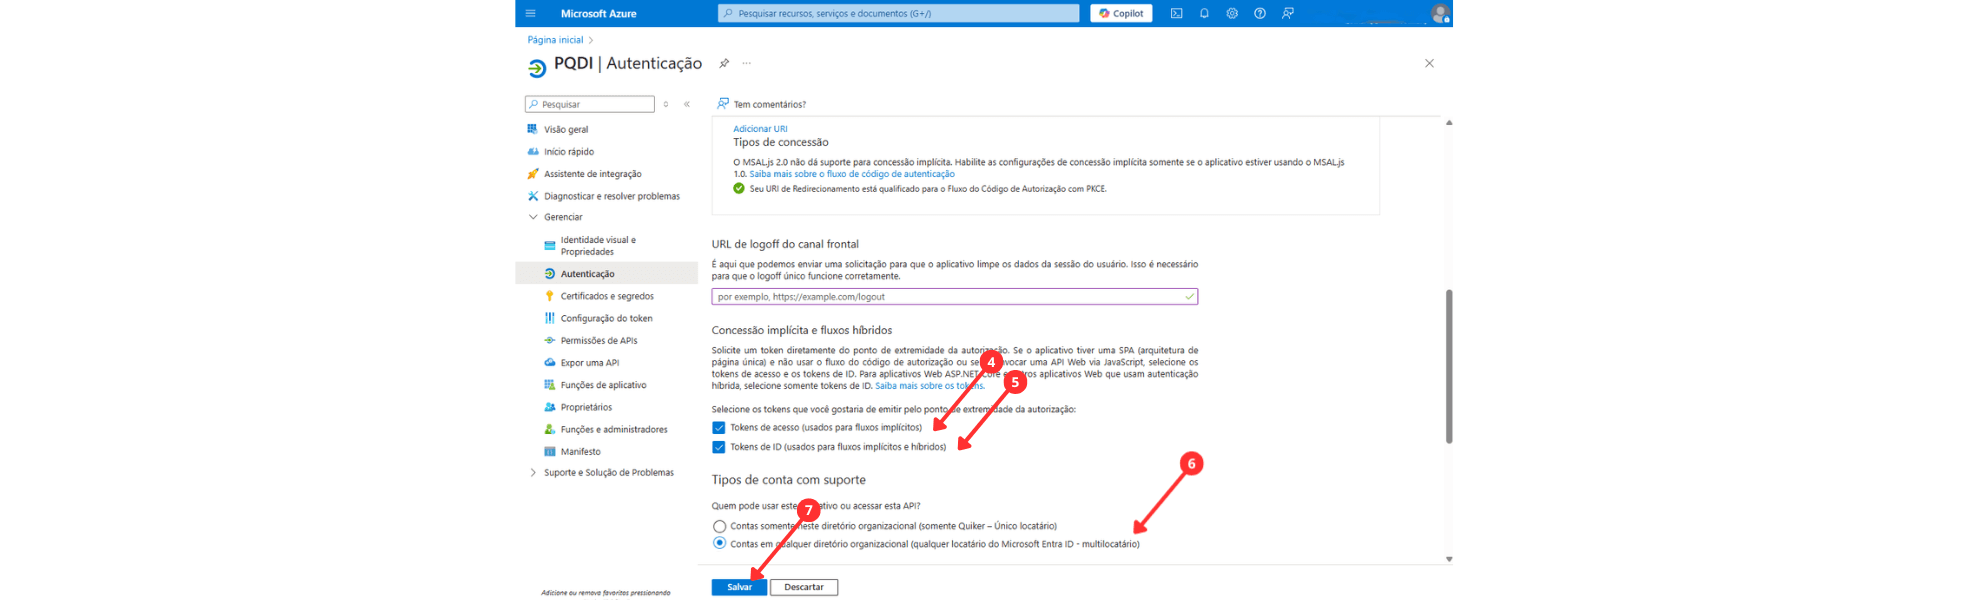
Still in Authentication, locate the Logout URL section (or “Front‑channel logout URL” for SPAs).
- In the “Front Channel Logout URL” field, enter the URL of the system login page.
Example:
https://slug_do_hub.quiker.com.br/auth
Mark the corresponding checks for each platform:
-
Check the option “Access tokens (used for implicit flows)”
-
Check the option **“ID tokens (used for implicit and hybrid flows)“**4. Under “Supported account types”, select “Accounts in any organizational directory (any Microsoft Entra ID tenant - multi-tenant)”
5.** **After making all selections, click “Save” at the bottom of the screen.
Final observations
The customer must ensure that all data provided is correct and up to date.
If the Client Secret expires, it will be necessary to generate a new one and update it on the platform.
The platform’s support team can assist during the process, if necessary.